accu chek guide me manual
- Published
- in Guide
Accu-Chek Guide Me Manual: A Comprehensive Guide
Welcome! This manual provides detailed instructions for the Accu-Chek Guide Me system, ensuring a smooth and efficient experience for managing your glucose levels effectively.
The Accu-Chek Guide Me system is designed to simplify blood glucose monitoring, offering a user-friendly experience for individuals managing diabetes. This system combines a meter, test strips, and a lancing device to provide accurate and reliable results. It’s built with intuitive features, aiming to make testing less daunting and more integrated into daily life.
This guide will walk you through every step, from initial setup and testing procedures to understanding your results and utilizing the system’s advanced features. Whether you are new to blood glucose monitoring or transitioning from another system, this manual will equip you with the knowledge to confidently manage your health. The system’s connectivity with the MySugr app further enhances data tracking and sharing with healthcare professionals, promoting proactive diabetes management.
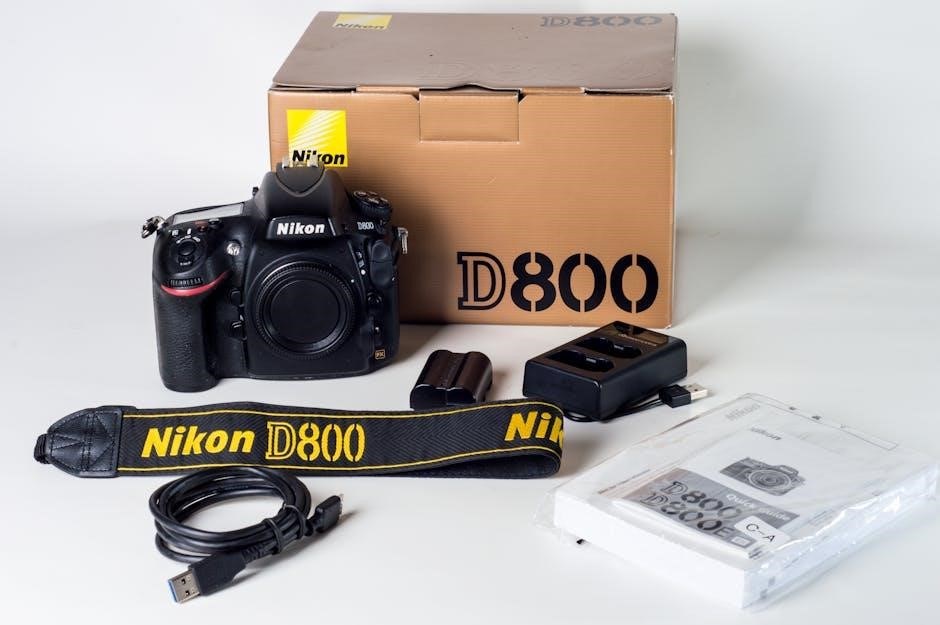
What’s Included in the Box
Your Accu-Chek Guide Me package contains several essential components to begin monitoring your blood glucose levels immediately. You will find the Accu-Chek Guide Me meter itself, the core device for reading your results. Included are Accu-Chek Guide test strips, crucial for the testing process – ensure compatibility with the meter. A sterile lancing device with a lancet is provided for obtaining blood samples, alongside a comfortable sampling drum.
Additionally, the box contains a quick guide for initial setup and testing, a user manual offering comprehensive instructions, and a logbook for recording your readings. A battery is pre-installed to power the meter, allowing for immediate use; Verify all components are present before proceeding; contact customer support if anything is missing to ensure a complete and functional system.
Setting Up Your Accu-Chek Guide Me
Begin by carefully inserting the test strip, activating the device, and setting the correct date and time for accurate tracking and personalized results.
Inserting the Test Strip
Proper test strip insertion is crucial for accurate blood glucose readings with your Accu-Chek Guide Me system. Ensure your hands are clean and dry before handling the strips. Gently slide the test strip, with the gray-colored end facing downwards, firmly into the strip port until it clicks into place.
The device automatically recognizes the strip, displaying a symbol to confirm correct insertion. Do not force the strip; if it doesn’t insert easily, check for obstructions or ensure you’re using the correct orientation.
Using an expired or damaged strip will yield inaccurate results, so always verify the expiration date and inspect the strip for any visible defects before insertion. Once inserted, the device is ready to receive your blood sample within a specified timeframe, indicated on the display.
Device Activation and Initial Setup
Activating your Accu-Chek Guide Me is a straightforward process. Upon first use, the device will prompt you through a guided setup. This includes selecting your preferred language and units of measurement (mg/dL or mmol/L). Follow the on-screen instructions carefully, using the side buttons to navigate and confirm your selections.
The system may ask for a code, often found on the packaging or within the test strip vial, to verify your device. This ensures authenticity and proper functionality.
Initial setup also allows you to personalize settings, such as target range preferences, which can be adjusted later. Ensure a stable surface during setup and a fully charged battery for uninterrupted operation.
Setting the Date and Time
Accurate date and time settings are crucial for proper data logging and tracking of your blood glucose readings. To set the date and time on your Accu-Chek Guide Me, navigate to the ‘Settings’ menu using the side buttons. This is typically accessed through the main menu after initial device activation.
Use the up and down buttons to adjust the year, month, and day, confirming each selection. Repeat this process for setting the hour and minute, ensuring you select AM or PM correctly.
Verify the accuracy of the displayed date and time before saving. Correct settings ensure your data is properly timestamped, allowing for meaningful analysis and sharing with your healthcare provider.

Performing a Blood Glucose Test
Testing is simple! Prepare the lancing device, obtain a blood sample, apply it to the test strip, and then read your glucose result accurately.
Preparing the Lancing Device
Proper preparation is key for a comfortable testing experience. Begin by removing the protective cap from the lancing device. Insert a new, sterile lancet firmly into the device, ensuring it clicks into place – never reuse lancets! Adjust the depth setting according to your skin type; start with a shallower setting and increase if needed to obtain an adequate blood sample.
Cock the lancing device to prepare it for use. This action primes the spring mechanism. Before testing, it’s recommended to clean the fingertip site with an alcohol swab and allow it to dry completely. This helps prevent infection and ensures accurate results. Always choose a different fingertip each time to avoid soreness and promote healing. Remember to safely dispose of used lancets in a sharps container.
Obtaining a Blood Sample
Gentle technique is crucial for a successful blood sample. After preparing the lancing device, firmly press it against the side of your chosen fingertip. Press the release button on the lancing device to prick the skin. Gently squeeze the fingertip near the puncture site to encourage a drop of blood to form – avoid excessive squeezing, as this can affect accuracy.
Wipe away the first drop of blood with a clean, dry cloth, as it may contain tissue fluid. Allow a second, round drop of blood to form. This drop is the one you will apply to the test strip. If you struggle to obtain a sufficient sample, gently massage your hand to improve circulation. Ensure adequate lighting for clear visibility during the process.
Applying Blood to the Test Strip
Careful application ensures accurate results. Once a sufficient blood drop has formed, gently touch the edge of the test strip to the blood. The strip will automatically draw the required amount of blood into the reaction area – do not smear or wipe the blood onto the strip. Ensure the blood fills the designated area completely; insufficient blood will lead to an error message.
Avoid touching the reaction area of the test strip with your fingers. Keep the meter steady during the blood application process. The meter will begin counting down, indicating that it is analyzing the sample. Do not remove the test strip until the meter displays your blood glucose result.
Reading Your Blood Glucose Result
The Accu-Chek Guide Me meter displays your blood glucose level in milligrams per deciliter (mg/dL). After the countdown finishes, your result will appear clearly on the screen. The meter also indicates whether the result is within your target range, above target, or below target, using color-coded indicators for quick interpretation.
Pay attention to any accompanying symbols or error messages displayed alongside the result. These provide additional information about the test. The result is automatically saved in the meter’s memory, allowing you to review your history. Remember to record your results in a logbook or utilize the connected MySugr app for comprehensive tracking and analysis.

Understanding Your Results
Interpreting your readings is crucial! This section details target ranges, what to do for high/low glucose, and how to decipher error messages effectively.
Target Blood Glucose Ranges
Understanding your ideal glucose levels is fundamental to effective diabetes management. Target ranges can vary based on individual factors like age, overall health, and diabetes type, so always consult your healthcare provider for personalized goals. Generally, for most adults with diabetes, a target range before meals falls between 80-130 mg/dL (4.4-7.2 mmol/L).
After meals (1-2 hours post-meal), the recommended range is typically less than 180 mg/dL (10.0 mmol/L). Maintaining levels within these ranges helps minimize long-term complications. It’s important to note that these are guidelines, and your doctor may adjust them based on your specific needs. Regularly monitoring and discussing your results with your healthcare team is vital for optimizing your diabetes control and achieving a healthier lifestyle. Consistent adherence to your personalized target range contributes significantly to overall well-being.
High and Low Blood Glucose – What to Do
Recognizing and responding to high or low blood glucose levels is crucial. Hypoglycemia (low blood sugar – typically below 70 mg/dL) requires immediate action. Consume 15-20 grams of fast-acting carbohydrates (like glucose tablets, juice, or regular soda). Recheck your blood glucose after 15 minutes; repeat if still low.
Hyperglycemia (high blood sugar – consistently above your target range) may require adjusting medication, diet, or exercise. Drink plenty of water to help flush excess glucose. If levels are very high or you experience symptoms like blurred vision or confusion, contact your healthcare provider immediately. Keep a record of episodes to share with your doctor, aiding in personalized treatment adjustments. Proactive management prevents complications and promotes stable glucose control.
Interpreting Error Messages
The Accu-Chek Guide Me displays error messages to indicate potential issues. Understanding these is vital for accurate results. “Strip Error” suggests a faulty or damaged test strip – try a new one. “Device Error” may require restarting the meter; if persistent, contact support. “Insufficient Blood” means the sample size was too small; re-test with a larger drop.
“Meter Error” indicates a problem with the meter itself, potentially needing calibration or replacement. Always refer to the manual’s troubleshooting section for specific error code explanations. Do not ignore error messages! They prevent inaccurate readings and ensure reliable glucose monitoring. Documenting errors helps your healthcare provider diagnose potential problems.

Accu-Chek Guide Me Features
Explore advanced functionalities! This system boasts memory for data review, a convenient strip port, and seamless Bluetooth connectivity with the MySugr app.
Memory Function and Data Review
Detailed Record Keeping: The Accu-Chek Guide Me system diligently stores your blood glucose readings, creating a comprehensive history for effective diabetes management. This built-in memory allows you to track trends over time, providing valuable insights into how your body responds to food, exercise, and medication.
Easy Data Access: Reviewing your data is straightforward. You can easily scroll through previous results directly on the device’s display. This feature empowers you to identify patterns and make informed decisions about your health. The system typically stores a significant number of readings, ensuring a substantial historical record is readily available.
Trend Analysis: By analyzing your stored data, you and your healthcare provider can gain a deeper understanding of your glucose control. This collaborative approach leads to personalized adjustments in your treatment plan, optimizing your overall well-being and minimizing potential complications.

Strip Port Functionality
Seamless Strip Insertion: The Accu-Chek Guide Me features a uniquely designed strip port, engineered for effortless and accurate test strip insertion. This ensures proper alignment and reliable communication between the strip and the meter, minimizing errors and maximizing testing precision.
Auto-Code Recognition: A key benefit of the strip port is its auto-code functionality. Each test strip contains a unique code, automatically recognized by the meter upon insertion. This eliminates the need for manual coding, reducing the risk of inaccurate results due to incorrect code entry – a significant convenience for users.
Secure Connection: The port provides a secure connection, guaranteeing stable data transfer during the testing process. This robust design contributes to the overall reliability and accuracy of your blood glucose measurements, empowering you to confidently manage your diabetes.
Bluetooth Connectivity and App Integration
Seamless Data Transfer: The Accu-Chek Guide Me utilizes Bluetooth technology to wirelessly synchronize your blood glucose readings with compatible smartphones and tablets. This eliminates the need for manual logging, streamlining your data management process and saving valuable time.
MySugr App Compatibility: The meter seamlessly integrates with the MySugr app, a comprehensive diabetes management tool. Through the app, you can view your blood glucose history, track trends, and gain valuable insights into your diabetes control.
Enhanced Data Analysis: The MySugr app offers advanced features like data logging, meal tracking, and medication reminders. You can also easily share your data with healthcare professionals, facilitating informed discussions and personalized treatment plans. This connectivity empowers proactive diabetes management.

Maintenance and Troubleshooting
Keep it Clean: Regular cleaning and proper battery replacement ensure optimal performance. Addressing common issues promptly will maintain accurate readings and device longevity.

Cleaning the Device
Maintaining Hygiene is Key: Regularly cleaning your Accu-Chek Guide Me device is crucial for accurate results and preventing the spread of infection. Before cleaning, always ensure the device is switched off. Use a soft, slightly damp cloth to wipe down the exterior of the meter, focusing on areas that come into contact with your skin.
Avoid Harsh Chemicals: Never use harsh cleaning agents, solvents, or abrasive materials, as these can damage the device. Isopropyl alcohol (70%) can be used sparingly on the strip port, but avoid getting any liquid inside the device. Ensure the device is completely dry before inserting a new test strip or using it again.
Lancing Device Care: The lancing device also requires regular cleaning. Wipe the exterior with a damp cloth and replace the lancet after each use to maintain sterility and prevent discomfort. Proper cleaning extends the life of your Accu-Chek Guide Me system and ensures reliable performance.
Replacing the Battery
Powering Your Device: The Accu-Chek Guide Me operates on standard batteries, and replacing them is a straightforward process. A low battery indicator will appear on the screen, signaling the need for a change. Ensure you use the correct type of battery as specified in the device documentation – typically AAA batteries.
Accessing the Battery Compartment: Locate the battery compartment, usually on the back or side of the meter. Gently slide or lift the compartment cover to access the batteries. Remove the old batteries, paying attention to the polarity (+ and -) markings.
Inserting New Batteries: Insert the new batteries, ensuring correct alignment with the polarity markings. Replace the battery compartment cover securely. The device should power on automatically. Dispose of used batteries responsibly, following local regulations.
Common Troubleshooting Steps
Addressing Issues: If you encounter problems with your Accu-Chek Guide Me, several troubleshooting steps can resolve common issues. First, ensure the test strip is inserted correctly and is not expired. If you receive an error message, consult the device’s manual for specific interpretations and solutions.
Connectivity Problems: For Bluetooth connectivity issues, verify Bluetooth is enabled on your smartphone and the meter is in pairing mode. If the meter doesn’t power on, replace the batteries. Ensure the lancing device is properly assembled and the lancet is fresh.
Inaccurate Readings: If readings seem inaccurate, re-test with a new strip and ensure proper blood sample application. If problems persist, contact Accu-Chek support for assistance.
Advanced Features & Tips
Unlock Potential: Explore personalized target range settings and leverage the MySugr app for data logging and seamless sharing with your healthcare provider.
Personalized Target Range Settings
Tailoring to You: The Accu-Chek Guide Me allows for customized blood glucose target range settings, a crucial feature for individual diabetes management. Unlike one-size-fits-all approaches, this system empowers you and your healthcare provider to define ranges specifically suited to your needs, lifestyle, and overall health goals.
Why Personalize? Target ranges aren’t universal; they depend on factors like age, activity level, diabetes type, and potential complications. Setting personalized ranges helps you interpret results more accurately and make informed decisions about diet, exercise, and medication. Adjusting these settings requires consultation with your doctor to ensure safety and effectiveness.
Accessing Settings: Through the device’s menu, you can modify your high and low glucose alert thresholds. Remember to document any changes made and discuss them during your regular check-ups. This feature promotes proactive diabetes care and improved control.
Using the MySugr App
Seamless Integration: The Accu-Chek Guide Me system seamlessly integrates with the MySugr app via Bluetooth connectivity, transforming your smartphone into a powerful diabetes management tool. This app automatically logs your blood glucose readings, eliminating manual entry and reducing the risk of errors.
App Features: MySugr offers a wealth of features, including trend analysis, personalized insights, and the ability to add meal and activity information. You can visualize your glucose patterns over time, identify potential triggers, and share reports with your healthcare team.
Enhanced Support: The app also provides a supportive community forum and educational resources. Pairing your device is simple – just follow the on-screen instructions within the MySugr app. Regular app updates ensure you have access to the latest features and improvements.
Data Logging and Sharing with Healthcare Professionals
Comprehensive Records: The Accu-Chek Guide Me system automatically logs every blood glucose reading with date and time stamps, creating a detailed history of your glucose control; This data is readily accessible through the device’s memory and, more conveniently, via the paired MySugr app.
Report Generation: MySugr allows you to generate comprehensive reports summarizing your glucose data over various time periods – daily, weekly, or monthly. These reports can be customized to highlight specific information relevant to your healthcare provider.
Easy Sharing: Sharing these reports is incredibly easy; You can directly email them to your doctor, export them as PDF files, or utilize the app’s secure sharing features. This facilitates informed discussions and collaborative decision-making regarding your diabetes management plan.