Jimmy Dean Pancake & Sausage Cooking Instructions: A Comprehensive Guide
This guide details preparing Jimmy Dean sausage and pancakes, offering diverse cooking methods and serving ideas for a delightful breakfast experience.
It covers everything from pan-frying patties to oven-baking rolls, ensuring a perfect meal every time.
Understanding Jimmy Dean Sausage Varieties
Jimmy Dean offers a diverse range of sausage products, catering to various preferences and dietary needs. Beyond the classic Original flavor, you’ll find options like Reduced Fat, Maple, and Bold flavors, each delivering a unique taste experience. The product line extends to patties, rolls, and bulk sausage, providing versatility for different breakfast preparations.
For those seeking leaner choices, the Reduced Fat varieties maintain a satisfying flavor profile while minimizing fat content. Maple sausage introduces a touch of sweetness, pairing exceptionally well with pancakes. The Bold varieties offer a more intense, savory experience. Understanding these distinctions is crucial for selecting the perfect sausage to complement your pancakes and personal taste.
Furthermore, Jimmy Dean also provides turkey sausage options, offering an alternative protein source. Recognizing these variations allows for informed decisions, ensuring a breakfast that’s both delicious and tailored to your preferences. Always check packaging for specific ingredient lists and nutritional information.
Jimmy Dean Sausage Patty Cooking Times
Achieving perfectly cooked Jimmy Dean sausage patties requires understanding optimal cooking times based on your chosen method. Pan-frying typically takes between 8-10 minutes, flipping halfway through, ensuring even browning and thorough cooking. The internal temperature should reach 160°F (71°C) for safe consumption.
Microwave cooking offers a quicker alternative, generally requiring 2-3 minutes on high, depending on your microwave’s wattage. However, microwaving may result in a less crispy texture compared to pan-frying. For larger quantities, consider oven baking at 375°F (190°C) for approximately 15-20 minutes, again verifying an internal temperature of 160°F.
Cooking times can slightly vary based on patty thickness and desired level of doneness. Always refer to the package instructions for specific recommendations. Consistent monitoring and using a food thermometer are key to ensuring the sausage is cooked through, delivering a flavorful and safe breakfast experience. Remember to adjust times accordingly.

Jimmy Dean Sausage Roll Cooking Instructions
Preparing a Jimmy Dean Sausage Roll is straightforward, offering a convenient and hearty breakfast option. Oven baking is the recommended method, preheating your oven to 375°F (190°C). Place the frozen roll, still in its packaging, on a baking sheet and bake for 45-50 minutes, or until the internal temperature reaches 165°F (74°C).
Alternatively, you can cook the roll in a skillet over medium heat. Remove the packaging and place the roll directly into the skillet. Cook for approximately 20-25 minutes, turning frequently to ensure even cooking and prevent burning. This method yields a slightly crispier exterior.
Regardless of the chosen method, allow the roll to rest for 5-10 minutes before slicing and serving. This allows the juices to redistribute, resulting in a more flavorful and tender product. Always verify the internal temperature with a food thermometer to guarantee thorough cooking and food safety. Enjoy with your favorite breakfast sides!
Pancake Mix Preparation: Basic Guidelines
Successfully preparing pancakes begins with understanding your mix. Most pancake mixes require only the addition of water or milk, though some benefit from a touch of melted butter or a beaten egg for enhanced richness and flavor. Always refer to the specific instructions on your pancake mix packaging, as ratios can vary between brands.
Generally, start by adding the liquid ingredients gradually, whisking continuously to avoid lumps. Avoid overmixing; a few small lumps are preferable to a batter that’s been overworked, as overmixing develops gluten, resulting in tougher pancakes. Let the batter rest for 5-10 minutes after mixing. This allows the gluten to relax and the leavening agents to activate, contributing to fluffier pancakes.
For optimal results, use room temperature liquids. This helps the ingredients combine more easily and promotes a smoother batter consistency. Remember, proper preparation is key to achieving light and airy pancakes!
Pancake Batter Consistency: Achieving Perfection
The ideal pancake batter should be smooth, but not overly thin. A slightly thick consistency is crucial for achieving fluffy pancakes that hold their shape. To test, lift a spoonful of batter and let it fall back into the bowl. It should fall in ribbons that slowly disappear, rather than immediately dissolving.
If the batter is too thick, add a tablespoon of liquid (milk or water) at a time, whisking gently until the desired consistency is reached. Conversely, if the batter is too thin, add a tablespoon of flour, again whisking carefully. Avoid adding too much flour at once, as this can lead to dense pancakes.
Remember that the batter will thicken slightly as it rests. Adjust accordingly. A properly prepared batter will yield pancakes that are tender, light, and beautifully golden brown. Consistency is key to pancake success!
Cooking Pancakes on a Griddle
A preheated griddle is essential for evenly cooked pancakes. Set the griddle to medium heat (around 350-375°F or 175-190°C). Lightly grease the surface with butter, oil, or cooking spray – avoid excessive grease, which can result in soggy pancakes. A thin, even coating is best.

Pour ¼ cup of batter onto the hot griddle for each pancake. Allow the pancakes to cook for 2-3 minutes per side, or until bubbles begin to form on the surface and the edges appear set. Gently flip the pancakes with a spatula and cook for another 1-2 minutes, or until golden brown.
Avoid pressing down on the pancakes while cooking, as this will deflate them. Keep cooked pancakes warm in a low oven (around 200°F or 93°C) until ready to serve; Consistent heat and gentle handling are vital for perfect griddle pancakes.

Cooking Pancakes in a Frying Pan
A non-stick frying pan is ideal for pancake preparation, though any frying pan can work with sufficient greasing. Heat the pan over medium heat. Test the temperature by flicking a few drops of water into the pan; they should sizzle and evaporate quickly. Add about a teaspoon of butter or oil, swirling to coat the surface evenly.
Pour ¼ cup of pancake batter onto the heated pan for each pancake, leaving space between them. Cook for approximately 2-3 minutes per side, watching for bubbles to form and pop on the surface. This indicates the underside is ready to flip.
Gently lift the pancake with a spatula and cook the other side for another 1-2 minutes, until golden brown. Adjust the heat if the pancakes are browning too quickly or are cooking unevenly. Keep finished pancakes warm while you cook the remaining batter.
Combining Sausage and Pancakes: Serving Suggestions
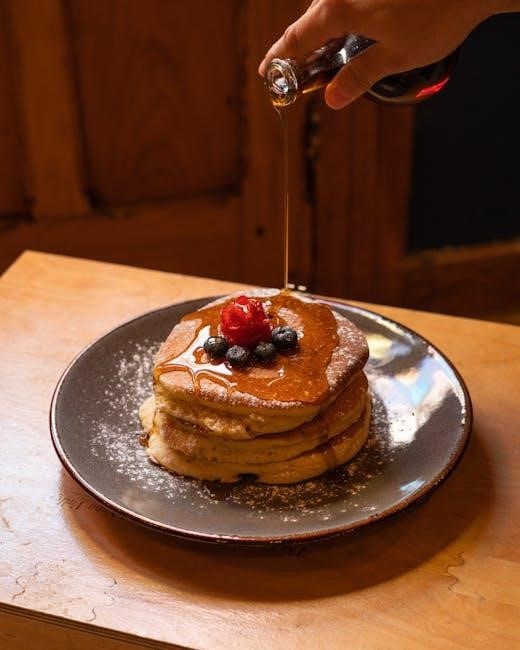
The classic pairing of Jimmy Dean sausage and pancakes offers endless breakfast possibilities! For a traditional experience, serve pan-fried or microwaved sausage patties alongside a stack of fluffy pancakes, drizzled with maple syrup. Crumbled sausage can even be mixed into the pancake batter for a savory twist.
Elevate your brunch by creating pancake sandwiches, layering pancakes with sausage, eggs, and cheese. A spicy kick can be added using Jimmy Dean’s hot sausage varieties. Consider a sweet and savory combination with fruit compote alongside the sausage and pancakes.
For a complete meal, add sides like scrambled eggs, fresh fruit, or a side of hash browns. Don’t forget the condiments – syrup, butter, and perhaps a dollop of sour cream or yogurt to complement the flavors. Enjoy!
Jimmy Dean Sausage & Pancake Breakfast for Two
This recipe provides a simple, satisfying breakfast for two people, utilizing Jimmy Dean sausage and pancake mix. You’ll need approximately 2/3 cup of pancake mix, following the package instructions for water/milk addition. For the sausage, 4 Jimmy Dean sausage patties (reduced fat turkey sausage is a great option!) are ideal.
Begin by cooking the sausage – pan-frying for about 4-5 minutes per side, or microwaving according to package directions. While the sausage cooks, prepare the pancake batter and heat a lightly oiled griddle or frying pan. Pour ¼ cup of batter per pancake, cooking for 2-3 minutes per side until golden brown.
Serve two pancakes per person alongside two sausage patties each. Enhance the meal with a drizzle of maple syrup and a side of fresh fruit for a balanced and delicious start to your day. Enjoy this quick and easy breakfast!

Jimmy Dean Sausage & Pancake Breakfast for Four
Scaling up for a family? This recipe delivers a hearty Jimmy Dean sausage and pancake breakfast for four hungry individuals. You’ll require approximately 1 1/3 cups of pancake mix, adhering to the package instructions for liquid measurements. For the sausage component, plan on using 8 Jimmy Dean sausage patties – consider a half-pound of crumbled sausage for variety.
Start by cooking the sausage. Pan-frying will take roughly 4-5 minutes per side, while microwaving offers a faster alternative (follow package guidelines). Simultaneously, prepare the pancake batter and preheat a griddle or large frying pan with a light coating of oil. Pour ¼ cup of batter for each pancake, cooking for 2-3 minutes per side until golden brown and fluffy.
Serve two pancakes and two sausage patties per person. A generous helping of maple syrup and a side of fresh berries complete this satisfying and convenient family breakfast.
Detailed Instructions: Jimmy Dean Sausage Patties (Pan-Fried)
For perfectly browned and flavorful Jimmy Dean sausage patties, pan-frying is a classic method. Begin by placing the desired number of patties in a cold skillet – this helps render the fat evenly. Avoid overcrowding the pan; work in batches if necessary. Set your stovetop to medium heat.
Cook for approximately 4-5 minutes on the first side, allowing a rich, golden-brown crust to form. Carefully flip the patties and continue cooking for another 3-4 minutes, ensuring they are cooked through. Internal temperature should reach 160°F (71°C) for safe consumption.
To minimize splattering, consider using a splatter screen. Once cooked, transfer the patties to a paper towel-lined plate to drain excess grease. This method delivers a deliciously crispy exterior and juicy interior, ideal for pairing with pancakes and eggs. Enjoy immediately!

Detailed Instructions: Jimmy Dean Sausage Patties (Microwave)
When time is short, microwaving Jimmy Dean sausage patties offers a quick and convenient solution. Place one or two patties on a microwave-safe plate covered with a paper towel. This helps absorb excess moisture and prevents splattering.
Microwave on high for approximately 60-90 seconds. Cooking time may vary depending on your microwave’s wattage and the number of patties. It’s crucial to check the internal temperature; it must reach 160°F (71°C) to ensure it’s fully cooked and safe to eat.
For even cooking, flip the patties halfway through the cooking process. Allow to stand for a minute after microwaving before serving. While not as crispy as pan-fried, this method provides a warm and satisfying breakfast option. Be cautious when removing the plate, as it may be hot.
Detailed Instructions: Jimmy Dean Sausage Roll (Oven)
For a hands-off cooking experience, baking a Jimmy Dean Sausage Roll in the oven delivers consistently delicious results. Preheat your oven to 375°F (190°C). Remove the sausage roll from its packaging and place it on a baking sheet lined with parchment paper for easy cleanup.
Bake for 25-30 minutes, or until the internal temperature reaches 160°F (71°C). Ensure thorough cooking for food safety. For a more evenly browned roll, rotate the baking sheet halfway through the cooking time. Let the roll rest for 5-10 minutes before slicing and serving.
This method is ideal for preparing breakfast for a larger group, as it allows you to focus on other breakfast components like pancakes. The oven ensures the sausage is cooked through while maintaining a juicy and flavorful interior. Enjoy with your favorite breakfast sides!
Detailed Instructions: Jimmy Dean Sausage Roll (Skillet)
For a quicker cooking method, preparing a Jimmy Dean Sausage Roll in a skillet offers convenience and delicious results. Begin by placing the frozen sausage roll in a cold skillet – do not thaw beforehand. This helps ensure even cooking and prevents the outside from burning before the inside is heated through.
Turn the heat to medium-low and cook for approximately 20-25 minutes, turning frequently to brown all sides evenly. Use a meat thermometer to verify the internal temperature reaches 160°F (71°C). Reduce heat if the roll is browning too quickly.
Once cooked through, remove from the skillet and let rest for 5 minutes before slicing. This allows the juices to redistribute, resulting in a more flavorful and tender sausage roll. Serve immediately with pancakes and your favorite breakfast accompaniments for a satisfying meal.
Safety Considerations: Recalls & Contamination
Staying informed about potential safety concerns regarding Jimmy Dean products is crucial for consumer health. As of March 5th, 2026, Hillshire Brands (a Tyson Foods subsidiary) has issued recalls for numerous Jimmy Dean and State Fair on-a-stick products due to potential contamination with wood particles.
These recalls affect a significant volume – over 50 million pounds – of frozen corn dog and sausage products. Consumers are advised to check product packaging for recall information and to avoid consuming any recalled items. The presence of wood particles poses a choking hazard and may cause digestive discomfort.
Regularly monitor official sources like the FDA and USDA websites for updated recall information. Proper food handling practices, including thorough cooking and refrigeration, are essential to minimize risks. Always prioritize food safety when preparing and serving Jimmy Dean sausage products.
Wood Particle Contamination in Jimmy Dean Products
Recent reports have highlighted a concerning issue: the presence of wood particles within certain Jimmy Dean sausage products, specifically those with batter coatings. Hillshire Brands initiated a large-scale recall impacting numerous batches of Jimmy Dean sausage and State Fair on-a-stick items due to this contamination.
The source of the wood particles remains under investigation, but the potential health risks are significant. Ingestion of these particles can cause choking hazards, particularly for young children and individuals with swallowing difficulties. Furthermore, they may lead to irritation or damage within the digestive tract.
Consumers are strongly urged to verify if their purchased products are included in the recall list published by Hillshire Brands and regulatory agencies. Discard any affected items immediately and avoid consumption. This situation underscores the importance of stringent quality control measures in food production.
Hillshire Brands Recall Information (Current as of 03/05/2026)
As of today, March 5th, 2026, Hillshire Brands has issued a comprehensive recall affecting a substantial volume of Jimmy Dean and State Fair on-a-stick products. This recall stems from the discovery of potential wood particle contamination within the batter coatings of these items. Over 50 million pounds of frozen products are impacted, representing a wide range of product codes and sell-by dates.
The recalled products include various sausage links, patties, and fully-cooked breakfast items. Consumers are advised to check the product packaging for specific lot codes and “best by” dates listed on the official Hillshire Brands recall website. Detailed information, including a complete list of affected products, is readily available there.
Hillshire Brands is offering full refunds for all recalled products. Consumers should not consume the affected items and are encouraged to discard them or return them to the place of purchase. Further updates and information can be found on the company’s website and through official press releases.
Proper Food Handling for Sausage Products
Maintaining food safety when handling Jimmy Dean sausage is crucial to prevent illness. Always begin with clean hands, washing thoroughly with soap and water before and after handling raw sausage. Prevent cross-contamination by using separate cutting boards and utensils for raw meat and other foods. Thoroughly clean and sanitize all surfaces that come into contact with the sausage.
Refrigerate sausage promptly; do not leave it at room temperature for more than two hours. Ensure your refrigerator maintains a temperature below 40°F (4°C). When thawing frozen sausage, do so in the refrigerator, in cold water, or in the microwave – never at room temperature. Cook sausage to an internal temperature of 160°F (71°C) as measured with a food thermometer to eliminate harmful bacteria.
Proper storage and cooking are essential for a safe and enjoyable breakfast experience. Discard any sausage that appears discolored or has an unusual odor.
Nutritional Information: Jimmy Dean Sausage
Understanding the nutritional content of Jimmy Dean sausage is important for balanced dietary choices. A typical serving size, often two patties, contains varying calories and macronutrients depending on the specific product (regular, reduced fat, turkey, etc.). Generally, a serving provides a significant amount of protein, essential for muscle building and repair.
However, Jimmy Dean sausage is also relatively high in fat, particularly saturated fat, and sodium. The calorie count can range from approximately 240 to 300 calories per serving. Macronutrient breakdown typically includes around 12-15 grams of fat, 10-12 grams of protein, and 500-700 milligrams of sodium;
Portion control is key when incorporating Jimmy Dean sausage into your diet. Consider opting for reduced-fat varieties or balancing your meal with healthier sides like fruits and vegetables to maintain a well-rounded nutritional intake. Always refer to the product packaging for the most accurate and up-to-date nutritional information.
Jimmy Dean Sausage: Ingredients Overview
Jimmy Dean sausage boasts a flavorful profile achieved through a carefully selected blend of ingredients. Pork is the primary component, providing the base for the savory taste. Seasonings play a crucial role, typically including salt, sugar, and a proprietary blend of spices that contribute to the signature Jimmy Dean flavor.
Additional ingredients often include dextrose, modified food starch, and sodium phosphates, which enhance texture and moisture retention. Flavorings, both natural and artificial, are used to amplify the overall taste experience. Casings, typically derived from collagen, encase the sausage mixture during processing.
It’s important to note that ingredient lists can vary slightly depending on the specific Jimmy Dean sausage variety (e.g., regular, maple, spicy). Consumers with allergies or dietary restrictions should carefully review the packaging for a complete and accurate ingredient declaration. Understanding these components allows for informed food choices.
Serving Size & Portion Control
Understanding serving sizes is crucial for balanced nutrition when enjoying Jimmy Dean sausage and pancakes. A standard serving of Jimmy Dean sausage patties typically consists of two patties, weighing approximately 2 ounces (56 grams). For sausage rolls, a serving is often defined as a 4-ounce (113 gram) portion.
Pancake serving sizes vary, but generally, 2-3 medium-sized pancakes constitute a single serving. Portion control is key to managing calorie intake and maintaining a healthy diet. Pairing sausage with pancakes requires mindful consideration of overall meal composition.
Be aware of individual caloric needs and adjust portion sizes accordingly. Utilizing smaller plates can visually aid in portion control. Reading nutrition labels provides detailed information on serving sizes and macronutrient content. Enjoying these breakfast staples in moderation contributes to a satisfying and balanced meal.
Calorie Count & Macronutrient Breakdown
Analyzing the nutritional profile of Jimmy Dean sausage and pancakes is essential for informed dietary choices. Two Jimmy Dean sausage patties (2oz) typically contain around 260-300 calories, with approximately 18-22 grams of fat, 12-15 grams of protein, and 2-4 grams of carbohydrates.
A serving of 2-3 medium pancakes (without toppings) generally provides 150-250 calories, consisting of 2-5 grams of fat, 3-6 grams of protein, and 30-50 grams of carbohydrates, largely from sugars and refined flour.
The macronutrient breakdown shifts significantly with added syrups or butter. Prioritizing whole-wheat pancake mixes and lean sausage varieties can lower the overall calorie count and increase nutritional value. Understanding these figures allows for mindful meal planning and portion adjustments to align with individual health goals.
Troubleshooting Common Pancake Problems
Pancake perfection isn’t always immediate; common issues often arise during cooking. If pancakes are sticking, ensure your griddle or pan is adequately heated and lightly greased – a non-stick surface is highly recommended. For flat, dense pancakes, avoid overmixing the batter; a few lumps are desirable, as overmixing develops gluten, resulting in a tough texture.
To achieve fluffier pancakes, incorporate a leavening agent like baking powder correctly and don’t press down on the pancakes while they cook. If pancakes are burning on the outside but raw inside, reduce the heat and cook for a longer duration.
Adjusting batter consistency is key; add a tablespoon of milk if too thick, or flour if too thin. Altitude adjustments may require slightly less baking powder and a touch more liquid.
Preventing Pancakes from Sticking
Sticking pancakes are a common breakfast frustration, but easily avoidable with proper technique. The most crucial step is ensuring your cooking surface – whether a griddle or frying pan – is sufficiently heated before adding any batter; A temperature test involves flicking a few drops of water onto the surface; they should sizzle and evaporate quickly.
Next, utilize a quality non-stick cooking spray or a thin layer of melted butter or oil. Avoid excessive grease, as this can lead to greasy pancakes. For cast iron griddles, proper seasoning is paramount; a well-seasoned surface naturally resists sticking.
Resist the urge to move the pancakes prematurely. Allow them to cook undisturbed until bubbles form and the edges appear set before attempting to flip. A thin, flexible spatula is also essential for a clean release.
Achieving Fluffy Pancakes
The secret to light and fluffy pancakes lies in a few key techniques, starting with the batter. Avoid overmixing! Overmixing develops the gluten in the flour, resulting in tough, flat pancakes. Gently combine the wet and dry ingredients until just combined; a few lumps are perfectly acceptable.
Incorporating air into the batter is also vital. Separating the eggs and beating the whites to stiff peaks before gently folding them into the batter adds significant volume. Alternatively, a tablespoon of baking powder per cup of flour ensures a good rise.
Letting the batter rest for 5-10 minutes allows the gluten to relax and the baking powder to activate, contributing to a lighter texture. Finally, don’t press down on the pancakes while they cook – this expels the air and results in a denser final product.
Adjusting Pancake Batter for Altitude
Baking at higher altitudes presents unique challenges, and pancake batter is no exception. Lower air pressure causes liquids to evaporate faster and leavening agents to rise more quickly, potentially resulting in dry, collapsed pancakes.
To compensate, reduce the amount of baking powder by 1/4 teaspoon per teaspoon called for in the recipe. This slows down the rising process. Increase the liquid – typically milk or water – by 1 tablespoon per cup of flour to counteract faster evaporation.
Slightly increasing the amount of flour, about 1 tablespoon per cup, can also help stabilize the batter. A longer resting time, around 10-15 minutes, allows the gluten to develop and better hold the structure. Experimentation is key, as adjustments vary based on specific altitude and recipe.